Run the application
- Understand the application
- Run the application
- Simulate failures
Now that you understand the Workflow and Activities, run the application. You'll start the Workflow, watch it appear in the Web UI, then start a Worker that executes the Activities and completes the transfer.
Start the Workflow
First, make sure the local Temporal Service is running. Open a new terminal window and run:
temporal server start-dev \
    --log-level=never \
    --ui-port 8080 \
    --db-filename=temporal.db
To start the Workflow, run this Maven command:
mvn compile exec:java \
    -Dexec.mainClass="moneytransferapp.TransferApp" \
    -Dorg.slf4j.simpleLogger.defaultLogLevel=warn
This command runs the TransferApp.java file, starting the Workflow process:
MONEY TRANSFER PROJECT

Initiating transfer of $62 from [Account 249946050] to [Account 591856595].

[WorkflowID: money-transfer-workflow]
[RunID: 37688cca-ffa2-48cf-809b-f18f5119bca3]
[Transaction Reference: 1480a22d-d0fc-4361]
The Task Queue is where Temporal Workers look for Workflows and Activities to execute. You define Task Queues by assigning a name as a string:
package moneytransferapp;

public interface Shared {
    static final String MONEY_TRANSFER_TASK_QUEUE = "MONEY_TRANSFER_TASK_QUEUE";
}
And here's how TransferApp.java connects to the Cluster and starts the Workflow:
import io.temporal.api.common.v1.WorkflowExecution;
import io.temporal.client.WorkflowClient;
import io.temporal.client.WorkflowOptions;
import io.temporal.serviceclient.WorkflowServiceStubs;

public class TransferApp {
    public static void main(String[] args) throws Exception {
        WorkflowServiceStubs serviceStub = WorkflowServiceStubs.newLocalServiceStubs();
        WorkflowClient client = WorkflowClient.newInstance(serviceStub);

        WorkflowOptions options = WorkflowOptions.newBuilder()
                .setTaskQueue(Shared.MONEY_TRANSFER_TASK_QUEUE)
                .setWorkflowId("money-transfer-workflow")
                .build();

        MoneyTransferWorkflow workflow = client.newWorkflowStub(MoneyTransferWorkflow.class, options);

        String referenceId = UUID.randomUUID().toString().substring(0, 18);
        String fromAccount = randomAccountIdentifier();
        String toAccount = randomAccountIdentifier();
        int amountToTransfer = ThreadLocalRandom.current().nextInt(15, 75);
        TransactionDetails transaction = new CoreTransactionDetails(fromAccount, toAccount, referenceId, amountToTransfer);

        WorkflowExecution we = WorkflowClient.start(workflow::transfer, transaction);

        System.out.printf("\nMONEY TRANSFER PROJECT\n\n");
        System.out.printf("Initiating transfer of $%d from [Account %s] to [Account %s].\n\n",
                          amountToTransfer, fromAccount, toAccount);
        System.out.printf("[WorkflowID: %s]\n[RunID: %s]\n[Transaction Reference: %s]\n\n",
                          we.getWorkflowId(), we.getRunId(), referenceId);
        System.exit(0);
    }
}
This tutorial uses a separate program to start the Workflow, but you don't have to follow this pattern. Most real applications start a Workflow as part of another program - in response to a button press or an API call.
View the state of the Workflow with the Temporal Web UI
Visit the Temporal Web UI where you'll see your Workflow listed.
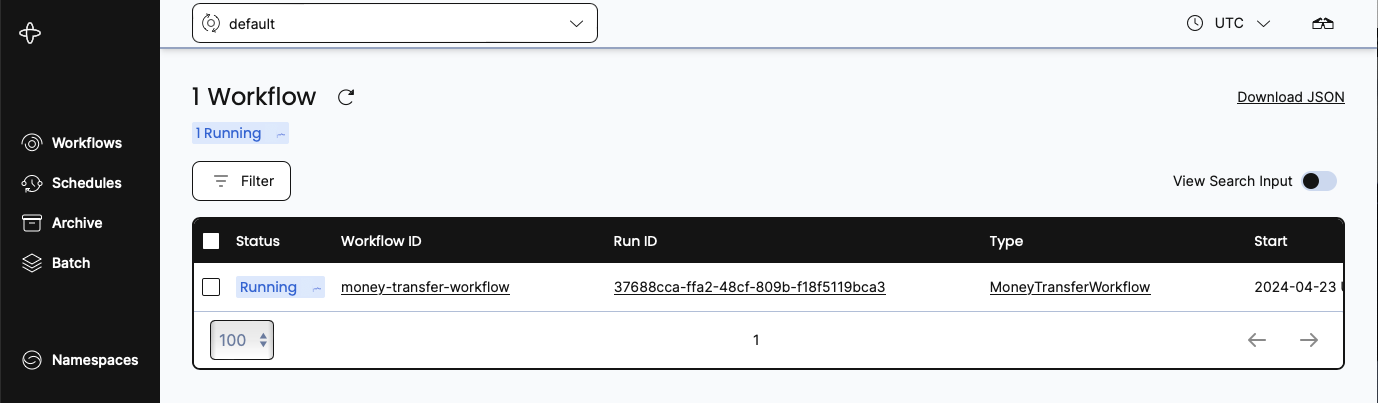
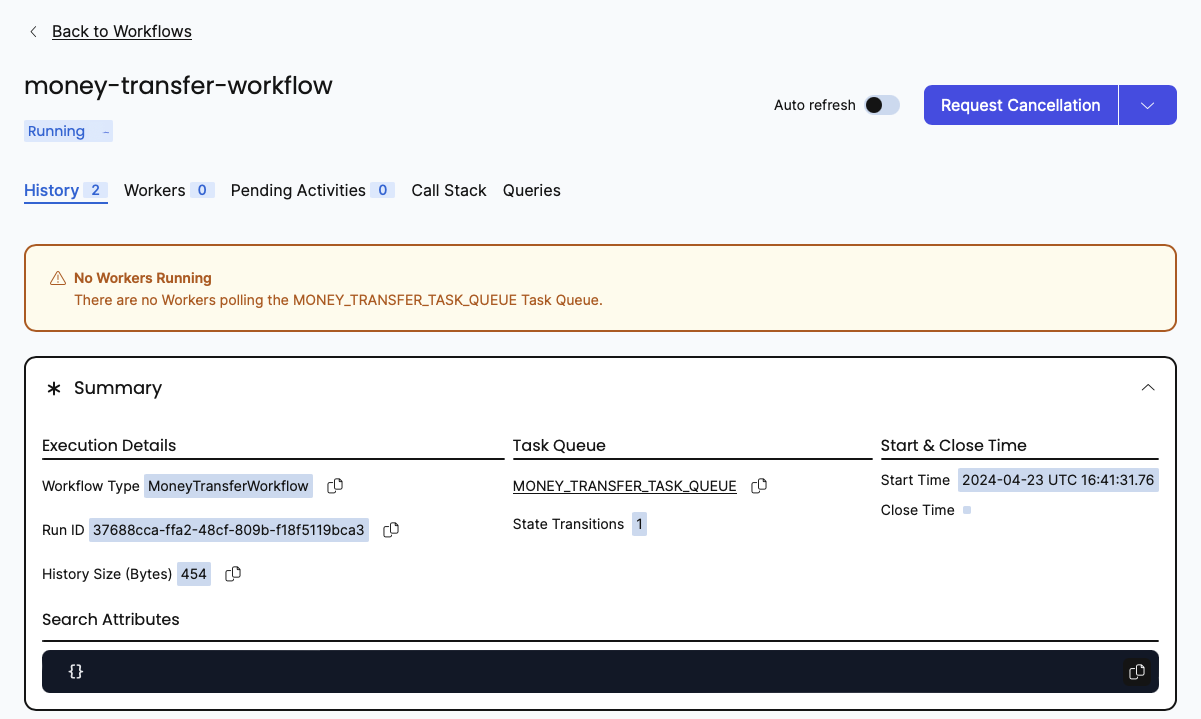
Click the Workflow ID. You can see everything about the execution: inputs, timeout configurations, scheduled retries, number of attempts, stack traces, and more.
Click the Input and Results section to see the inputs:
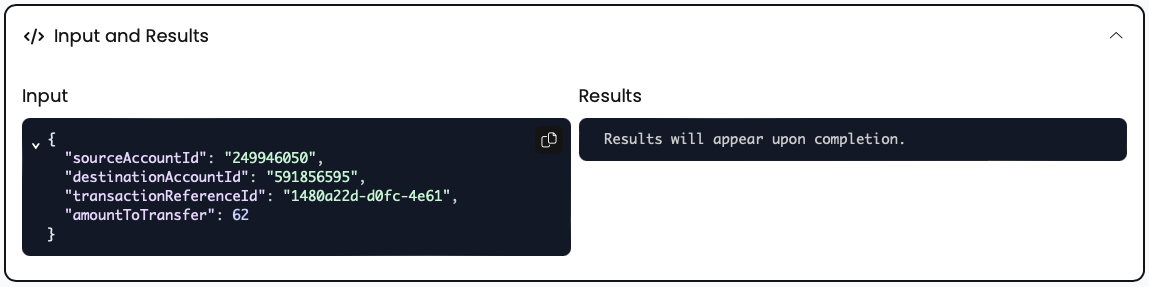
The Workflow is running, but it hasn't executed yet - there are no Workers connected to the Task Queue. You'll start the Worker next.
Start a Worker
A Worker is responsible for executing pieces of Workflow and Activity code. The Worker:
- can only execute Workflows and Activities registered to it.
- knows which piece of code to execute based on the Tasks it gets from the Task Queue.
- only listens to the Task Queue that it's registered to.
Open a new terminal window. In this new window, run the following command to start the Worker:
mvn compile exec:java \
    -Dexec.mainClass="moneytransferapp.MoneyTransferWorker" \
    -Dorg.slf4j.simpleLogger.defaultLogLevel=warn
Like the program that started the Workflow, it connects to the Temporal Cluster and registers the Workflow and the three Activities:
package moneytransferapp;

import io.temporal.client.WorkflowClient;
import io.temporal.serviceclient.WorkflowServiceStubs;
import io.temporal.worker.Worker;
import io.temporal.worker.WorkerFactory;

public class MoneyTransferWorker {

    public static void main(String[] args) {
        WorkflowServiceStubs serviceStub = WorkflowServiceStubs.newLocalServiceStubs();
        WorkflowClient client = WorkflowClient.newInstance(serviceStub);
        WorkerFactory factory = WorkerFactory.newInstance(client);

        Worker worker = factory.newWorker(Shared.MONEY_TRANSFER_TASK_QUEUE);
        worker.registerWorkflowImplementationTypes(MoneyTransferWorkflowImpl.class);
        worker.registerActivitiesImplementations(new AccountActivityImpl());

        System.out.println("Worker is running and actively polling the Task Queue.");
        System.out.println("To quit, use ^C to interrupt.");

        factory.start();
    }
}
When the Worker starts, it begins polling the Task Queue. The output looks like this:
Worker is running and actively polling the Task Queue.
To quit, use ^C to interrupt.

Withdrawing $62 from account 249946050.
[ReferenceId: 1480a22d-d0fc-4361]

Depositing $62 into account 591856595.
[ReferenceId: 1480a22d-d0fc-4361]
[1480a22d-d0fc-4361] Transaction succeeded.
Check the Web UI again. You'll see one Worker registered, and the Workflow status shows that it completed:
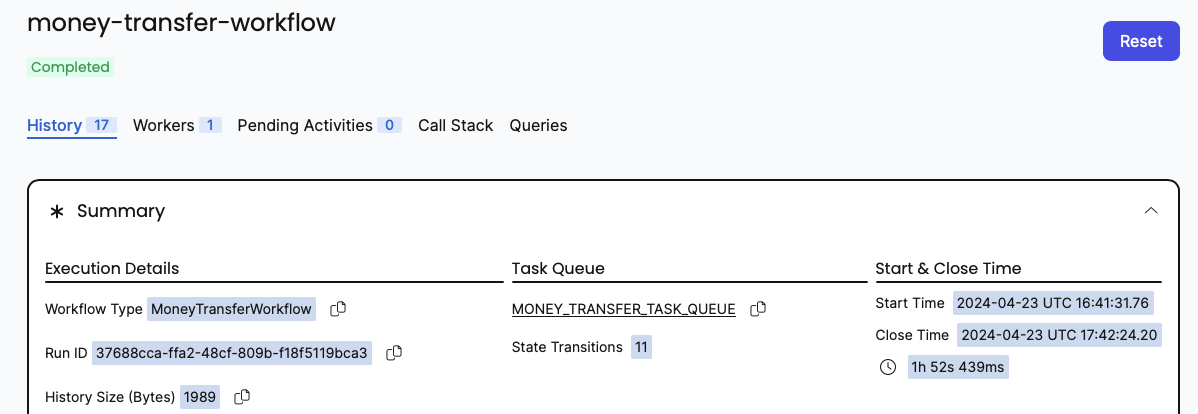
Each of these steps is recorded in the Event History, which you can audit under the History tab next to Summary. After a Workflow completes, the full history persists for a retention period (typically 7 to 30 days).
You just ran a Temporal Workflow application and saw how Workflows, Activities, and Workers interact. Next you'll explore how Temporal handles failures.
Get notified when we launch new educational content
New courses, tutorials, and learning resources - straight to your inbox.