Set up a Temporal Application project
- Introduction
- Project setup
- Durable execution
The first step to creating a new Temporal Application is to set up your development environment. This chapter walks through the steps to do that using the TypeScript SDK.
This chapter covers the minimum set of concepts and implementation details needed to build and run a Temporal Application using TypeScript. By the end of this section you will know how to construct a new Temporal Application project.
Learning objectives:
- Describe the tools available and recommended to develop Workflows.
- Describe the code that actually forms a Temporal application.
- Implement an appropriate testing framework.
Much of the information in this chapter is also covered in the Temporal 101 course.
This chapter introduces the Background Check use case and a sample application to contextualize the information. There are three ways to follow this guide:
- Use a local dev server
- Use Temporal Cloud
- Use a self-hosted environment such as Docker
In this chapter you will:
- Download the Temporal CLI.
- Choose your development Cluster.
- Create a Namespace on your development Cluster.
- Copy boilerplate code into your IDE.
- Run your Worker.
- Start the Workflow using the Temporal CLI.
- Explore the Web UI to view the status of the Workflow.
- Add a testing framework and unit tests to the application.
- Run the application unit tests.
Install the Temporal CLI
The Temporal CLI is available on macOS, Windows, and Linux. Reference the documentation for detailed install information.
Install via download
- Download the version for your OS and architecture:
- Linux amd64
- Linux arm64
- macOS amd64
- macOS arm64 (Apple silicon)
- Windows amd64
- Extract the downloaded archive.
- Add the
temporalbinary to yourPATH(temporal.exefor Windows).
Install via Homebrew
brew install temporal
Build from source
- Install Go
- Clone the repository.
- Switch to the cloned directory and run
go build ./cmd/temporal.
Choose a development Cluster
We recommend choosing a development environment based on your requirements. For most developers we recommend starting with one of the following:
- Local development server
- Temporal Cloud
- Self-hosted Temporal Cluster
Keep in mind that in every scenario, the Temporal Platform does not host and run your Workers (application code). It is up to you, the developer, to host your application code. The Temporal Platform ensures that properly written code durably executes in the face of platform-level failures.
Local dev server
Use the local development server if you are new to Temporal or want to start from scratch without a self-hosted environment or Temporal Cloud account.
The Temporal CLI comes bundled with a development server. The local development server does not emit metrics. For Cluster-level metrics, use a self-hosted Cluster or Temporal Cloud.
Start the dev server with:
temporal server start-dev
This command starts the Temporal Web UI, creates a default Namespace, and creates an in-memory database. The Web UI serves at http://localhost:8233.
Create a custom Namespace for the application using the Temporal CLI:
temporal operator namespace create backgroundcheck_namespace
Temporal Cloud
Start with Temporal Cloud if you already have a production use case, or need to move a scalable proof of concept into production. Temporal Cloud is ideal if you are ready to run at scale and don't want the overhead of managing your own self-hosted Cluster.
To create a Namespace in Temporal Cloud, follow the instructions in How to create a Namespace.
Store certificates and private keys generated for your Namespace as files or environment variables in your project. You need access to your certificate and key to run your Workers and start Workflows. For more information, see How to manage certificates in Temporal Cloud.
Self-hosted Temporal Cluster
Use a self-hosted environment if you are starting something new and need to scale with production-level features, but don't yet need Temporal Cloud. To follow along, install:
Then clone the temporalio/docker-compose repository, change directory into the project, and run:
git clone https://github.com/temporalio/docker-compose.git
cd docker-compose
docker compose up
Create a command alias for the Temporal CLI:
alias temporal_docker="docker exec temporal-admin-tools temporal"
Create a Namespace:
temporal_docker operator namespace create backgroundcheck_namespace
Boilerplate Temporal Application project code
Start with a single Workflow and register that function with a Worker. After you get the Worker running and started a Workflow Execution, you will add a testing framework.
Project structure
Group Workflows together, Activities together, and separate your Worker process into a standalone file. For monorepo-style organizations, use a designated Workflow directory for each use case. Example:
monorepo/
├── backgroundcheck
│   ├── activities
│   ├── tests
│   │   ├── backgroundcheck.tests.ts
│   │   └── ssntracen.tests.ts
│   ├── worker.ts
│   └── workflows
│       └── backgroundcheck.ts
├── loanapplication
│   ├── activities
│   │   └── creditcheck.ts
│   ├── tests
│   │   ├── creditcheck.tests.ts
│   │   └── loanapplication.tests.ts
│   ├── worker.ts
│   └── workflows
│       └── loanapplication.ts
├── shared_activities
│   ├── payment.ts
│   └── send_email.ts
└── shared_tests
    └── tests.ts
Your project will look like this when you've finished this chapter:
├── README.md
├── package-lock.json
├── package.json
├── src
│   ├── activities.ts
│   ├── client.ts
│   ├── mocha
│   │   ├── backgroundcheck.test.ts
│   │   └── ssntrace.test.ts
│   ├── worker.ts
│   └── workflows.ts
└── tsconfig.json
Initialize the TypeScript project
The TypeScript SDK offers a project creation tool. Run:
npx @temporalio/create --sample empty backgroundcheck
The Temporal TypeScript SDK is dropping support for Node.js 14 and Node.js 16 due to their end-of-life status. The Temporal TypeScript SDK 1.9 version is the last minor release supporting Node.js 14, and version 1.10 may be the last supporting Node.js 16.
You'll see output like the following as the generator runs:
Creating a new Temporal project in /Users/brianhogan/dev/documentation-samples-typescript/backgroundcheck/

Downloading files for sample empty. This might take a moment.

Installing packages. This might take a couple of minutes.
Initialize a Git repository when prompted. The tool then confirms your project is created:
Success! Created project backgroundcheck at:

~/backgroundcheck/
Switch to the backgroundcheck folder:
cd backgroundcheck
The project generator created the following directory structure:
├── README.md
├── node_modules
├── package-lock.json
├── package.json
├── src
│   ├── activities.ts
│   ├── client.ts
│   ├── mocha
│   ├── worker.ts
│   └── workflows.ts
└── tsconfig.json
package.jsonholds project dependencies and scripts to run Workflows, tests, linting, and formatting.tsconfig.jsonholds the TypeScript configuration designed for working with Temporal's SDK.src/activities.tsis where you define Activities.src/client.tshas the code for a small CLI program to execute a Workflow.src/mochais where you'll place your tests.src/workflows.tsis where you define Workflows.src/worker.tshas the code to configure and run your Worker process.
Boilerplate Workflow code
In the Temporal TypeScript SDK programming model, a Workflow Definition is an exportable function. Open src/workflows.ts and add the Workflow Definition:
import * as workflow from '@temporalio/workflow';
import type * as activities from './activities';

const { ssnTrace } = workflow.proxyActivities<typeof activities>({
  startToCloseTimeout: '10 seconds',
});

export async function backgroundCheck(ssn: string): Promise<string> {
  return await ssnTrace(ssn);
}
Workflows may have any number of custom parameters, but we strongly recommend using objects as parameters so individual fields may be altered without changing the Workflow signature. All Workflow parameters must be serializable.
To return a value, use Promise<something>. The Promise makes asynchronous calls and comes with guarantees.
Workflow logic is constrained by deterministic execution requirements. In the Temporal TypeScript SDK, Workflows run in a deterministic sandboxed environment. The code is bundled on Worker creation using Webpack and can import any package that does not reference Node.js or DOM APIs.
If you must use a library that references a Node.js or DOM API and you are certain those APIs are not used at runtime, add that module to the ignoreModules list.
In the TypeScript SDK you can safely use non-deterministic methods - the sandbox replaces non-deterministic code with deterministic versions. However, side effects and access to external state must be done through Activities. Workflow code cannot directly import the Activity Definition, but Activity Types can be imported so you can invoke them in a type-safe way.
Boilerplate Activity code
In the Temporal TypeScript SDK programming model, an Activity is an exportable async function. Add the following code to src/activities.ts:
export async function ssnTrace(param: string): Promise<string> {
  // This is where a call to another service is made
  // Here we are pretending that the service that does SSNTrace returned "pass"
  return 'pass';
}
This Activity Definition uses a single input parameter and returns a string. We recommend creating an Interface and using a single input parameter rather than multiple input parameters.
Run a dev server Worker
To run a Worker Process with a local development server:
- Initialize a connection with the Temporal server.
- Create a Worker by passing the Client to the create call.
- Register the Workflow and Activity functions.
- Call
run()on the Worker.
Add the following code to src/worker.ts:
import { NativeConnection, Worker } from '@temporalio/worker';
import * as activities from './activities';

async function run() {
  // Step 1: Establish a connection with Temporal server.
  //
  // Worker code uses `@temporalio/worker.NativeConnection`.
  // (But in your application code it's `@temporalio/client.Connection`.)
  const connection = await NativeConnection.connect({
    address: 'localhost:7233',
    // TLS and gRPC metadata configuration goes here.
  });
  // Step 2: Register Workflows and Activities with the Worker and specify your
  // namespace and Task Queue.
  const worker = await Worker.create({
    connection,
    namespace: 'default',
    taskQueue: 'background-check',
    // Workflows are registered using a path as they run in a separate JS context.
    workflowsPath: require.resolve('./workflows'),
    activities,
  });

  // Step 3: Start accepting tasks on the `background-check` queue
  //
  // The worker runs until it encounters an unexepected error or the process receives a shutdown signal registered on
  // the SDK Runtime object.
  //
  // By default, worker logs are written via the Runtime logger to STDERR at INFO level.
  //
  // See https://typescript.temporal.io/api/classes/worker.Runtime#install to customize these defaults.
  await worker.run();
}

run().catch((err) => {
  console.error(err);
  process.exit(1);
});
Use nodemon to automatically restart the Worker Process whenever code files in your project change. This is automatically configured when you use @temporalio/create:
npm run start.watch
Run a Temporal Cloud Worker
A Temporal Cloud Worker requires that you specify the following in the Client connection options:
- Temporal Cloud Namespace
- Temporal Cloud Address
- Certificate and private key associated with the Namespace
Add the following to src/worker.ts to communicate with Temporal Cloud using an mTLS connection, with configuration provided via environment variables:
import fs from 'fs/promises';

import { NativeConnection, Worker } from '@temporalio/worker';
import * as activities from './activities';

// Note that serverNameOverride and serverRootCACertificate are optional.
async function run({
  address,
  namespace,
  clientCertPath,
  clientKeyPath,
  serverNameOverride,
  serverRootCACertificatePath,
  taskQueue,
}: Env) {
  let serverRootCACertificate: Buffer | undefined = undefined;
  if (serverRootCACertificatePath) {
    serverRootCACertificate = await fs.readFile(serverRootCACertificatePath);
  }

  const connection = await NativeConnection.connect({
    address,
    tls: {
      serverNameOverride,
      serverRootCACertificate,
      clientCertPair: {
        crt: await fs.readFile(clientCertPath),
        key: await fs.readFile(clientKeyPath),
      },
    },
  });

  const worker = await Worker.create({
    connection,
    namespace,
    workflowsPath: require.resolve('./workflows'),
    activities,
    taskQueue,
  });
  console.log('Worker connection successfully established');

  await worker.run();
  await connection.close();
}

run(getEnv()).catch((err) => {
  console.error(err);
  process.exit(1);
});

// Helpers for configuring the mTLS client and worker samples
function requiredEnv(name: string): string {
  const value = process.env[name];
  if (!value) {
    throw new ReferenceError(`${name} environment variable is not defined`);
  }
  return value;
}

export interface Env {
  address: string;
  namespace: string;
  clientCertPath: string;
  clientKeyPath: string;
  serverNameOverride?: string;
  serverRootCACertificatePath?: string;
  taskQueue: string;
}

export function getEnv(): Env {
  return {
    address: requiredEnv('TEMPORAL_ADDRESS'),
    namespace: requiredEnv('TEMPORAL_NAMESPACE'),
    clientCertPath: requiredEnv('TEMPORAL_CLIENT_CERT_PATH'),
    clientKeyPath: requiredEnv('TEMPORAL_CLIENT_KEY_PATH'),
    serverNameOverride: process.env.TEMPORAL_SERVER_NAME_OVERRIDE,
    serverRootCACertificatePath: process.env.TEMPORAL_SERVER_ROOT_CA_CERT_PATH,
    taskQueue: process.env.TEMPORAL_TASK_QUEUE || 'hello-world-mtls',
  };
}
You'll use the Temporal Cloud Namespace Id, the Namespace's gRPC endpoint, and paths to the SSL certificate (.pem) and private key (.key).
Run a self-hosted Worker
Confirm network
The default docker-compose.yml in the temporalio/docker-compose repo has the Temporal Server exposed on port 7233 on the temporal-network:
services:
  # ...
  temporal:
    container_name: temporal
    # ...
    networks:
      - temporal-network
    ports:
      - 7233:7233
    # ...
  # ...
To list available networks:
docker network ls
Confirm IP address
Inspect the network:
docker network inspect temporal-network
Look for the container named temporal. Example output:
[
  {
    "Name": "temporal-network",
    // ...
    "Containers": {
      // ...
      "53cf62f0cc6cfd2a9627a2b5a4c9f48ffe5a858f0ef7b2eaa51bf7ea8fd0e86f": {
        "Name": "temporal",
        // ...
        "IPv4Address": "172.18.0.4/16"
        // ...
      }
      // ...
    }
    // ...
  }
]
Copy the IP address.
Customize Client options
Set the IP address, port, and Namespace in the Client options in src/worker.ts:
import { NativeConnection, Worker } from '@temporalio/worker';
import * as activities from './activities';

async function run() {
  // Step 1: Establish a connection with Temporal server.
  //
  // Worker code uses `@temporalio/worker.NativeConnection`.
  // (But in your application code it's `@temporalio/client.Connection`.)
  const connection = await NativeConnection.connect({
    address: '172.18.0.4:7233',
    // TLS and gRPC metadata configuration goes here.
  });
  // Step 2: Register Workflows and Activities with the Worker and specify your
  // namespace and Task Queue.
  const worker = await Worker.create({
    connection,
    namespace: 'backgroundcheck_namespace',
    taskQueue: 'hello-world',
    // Workflows are registered using a path as they run in a separate JS context.
    workflowsPath: require.resolve('./workflows'),
    activities,
  });

  await worker.run();
}

run().catch((err) => {
  console.error(err);
  process.exit(1);
});
Build and deploy Docker image
Add a Dockerfile to the root of your project. Name the file dockerfile with no extension:
FROM node:20 as build

WORKDIR /app

COPY package.json /app
COPY package-lock.json /app

RUN npm ci

COPY tsconfig.json /app/
COPY src /app/src

RUN npm run build

# Reinstall without dev dependencies now that the application is built
RUN npm ci --omit dev

FROM gcr.io/distroless/nodejs20-debian11


COPY --from=build /app/node_modules /app/node_modules
COPY --from=build /app/lib /app/lib

CMD ["/app/lib/worker.js"]
Build the Docker image:
docker build . -t backgroundcheck-worker-image:latest
Run the Worker on the same network as the Temporal Cluster:
docker run --network temporal-network backgroundcheck-worker-image:latest
Start a Workflow using the Temporal CLI
You can use the Temporal CLI to start a Workflow whether you are using a local development server, Temporal Cloud, or a self-hosted environment. You'll provide additional options when operating with Temporal Cloud or self-hosted environments.
Local dev server
Use the Temporal CLI temporal workflow start command to start your Workflow:
temporal workflow start \
 --task-queue backgroundcheck-boilerplate-task-queue-local \
 --type backgroundCheck \
 --input '"555-55-5555"' \
 --namespace backgroundcheck_namespace \
 --workflow-id backgroundcheck_workflow
Parameters:
--task-queue: The name of the Task Queue for the Workflow Execution's Tasks.--type: The Workflow Type name (by default, the function name).--input: A valid JSON object that can be unmarshaled into the parameter(s) the Workflow function accepts.--namespace: The Namespace to run your Application in.--workflow-id: A custom identifier you provide.
List Workflows
temporal workflow list \
 --namespace backgroundcheck_namespace
View in Web UI
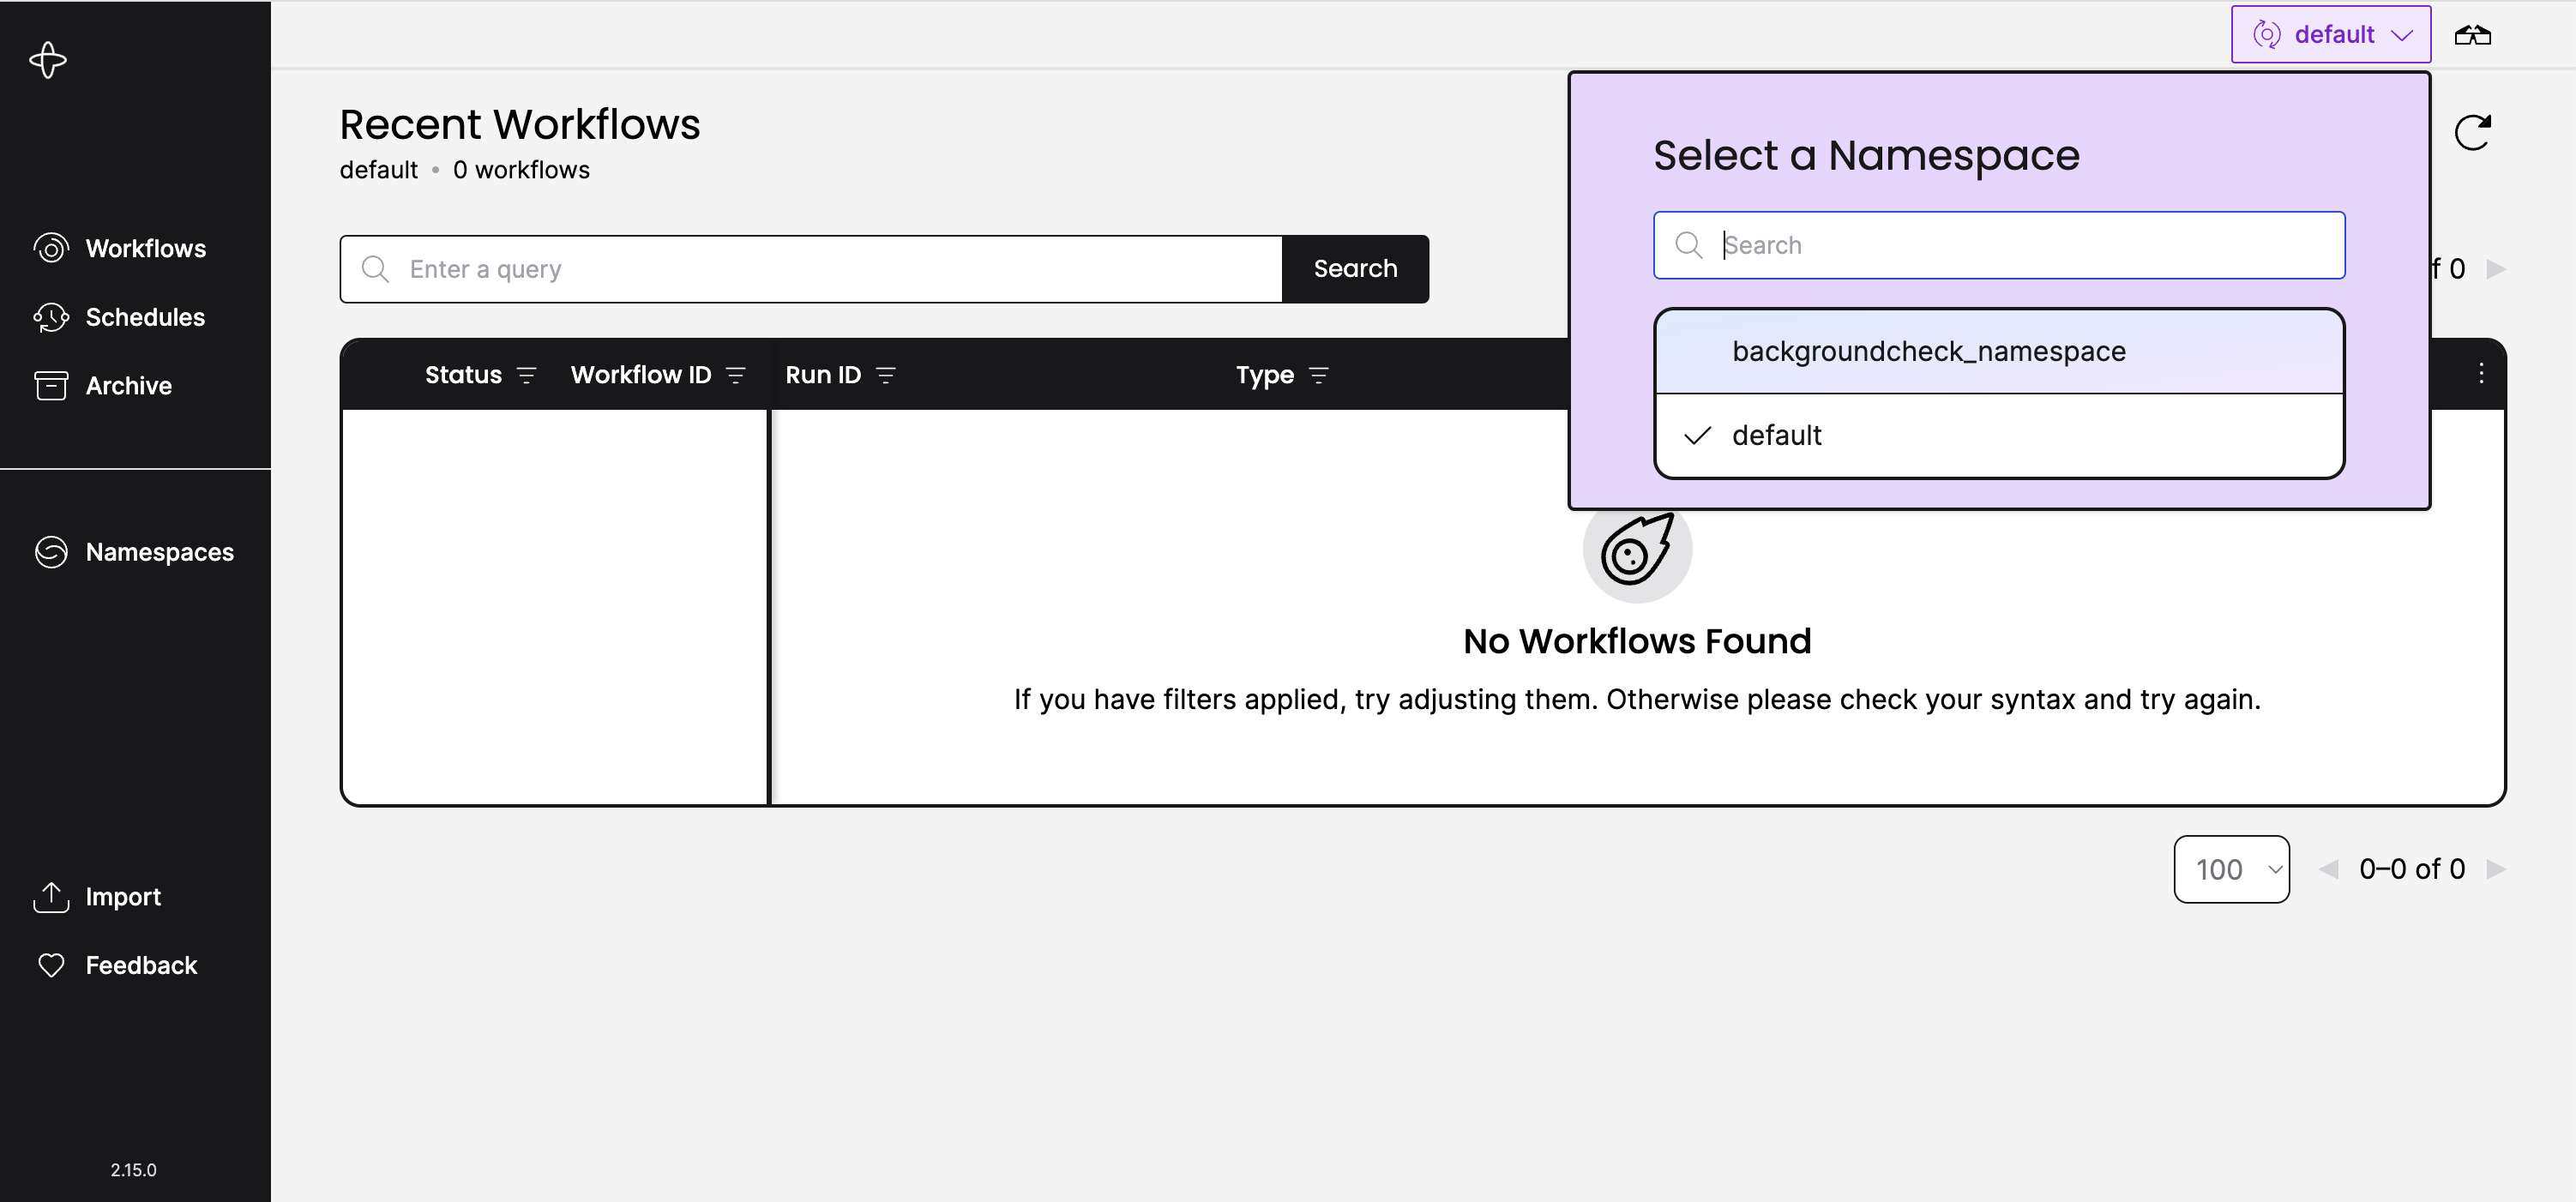
The local development server starts the Web UI at http://localhost:8233. Use the Namespace dropdown to select the project Namespace:
Confirm polling Worker
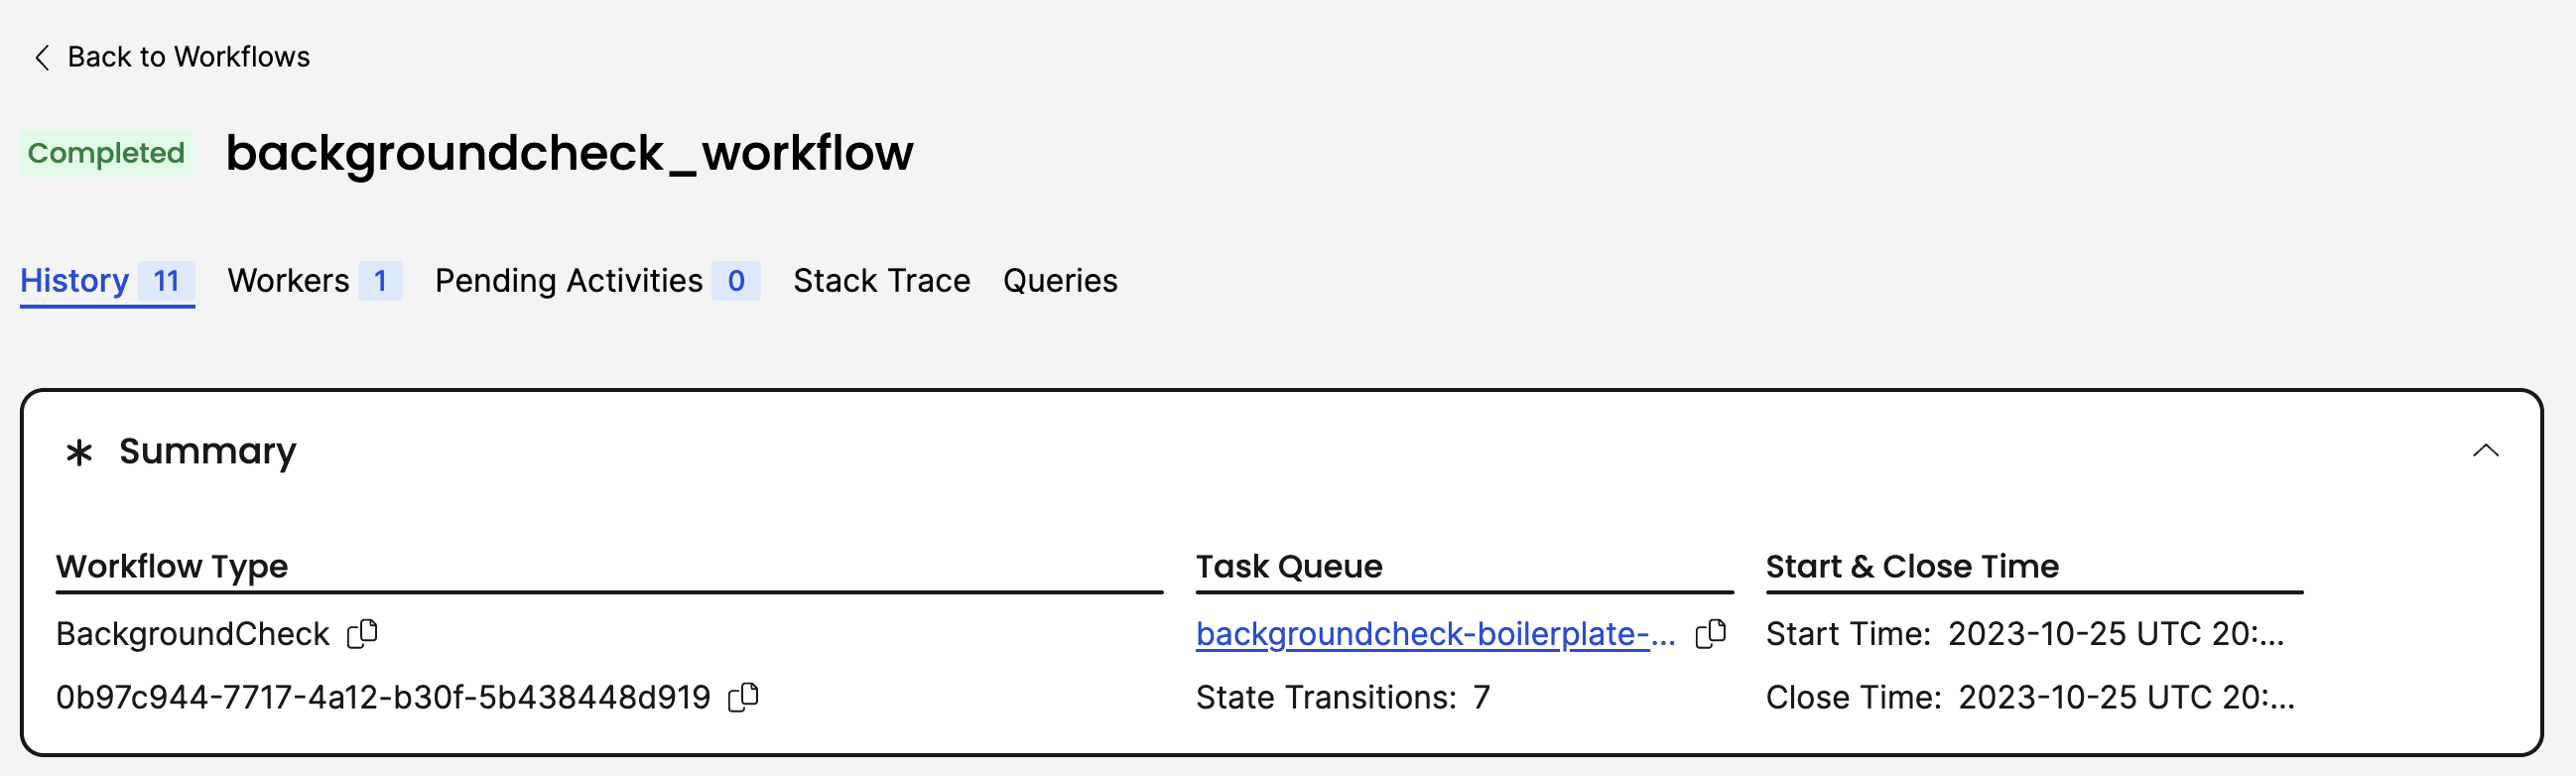
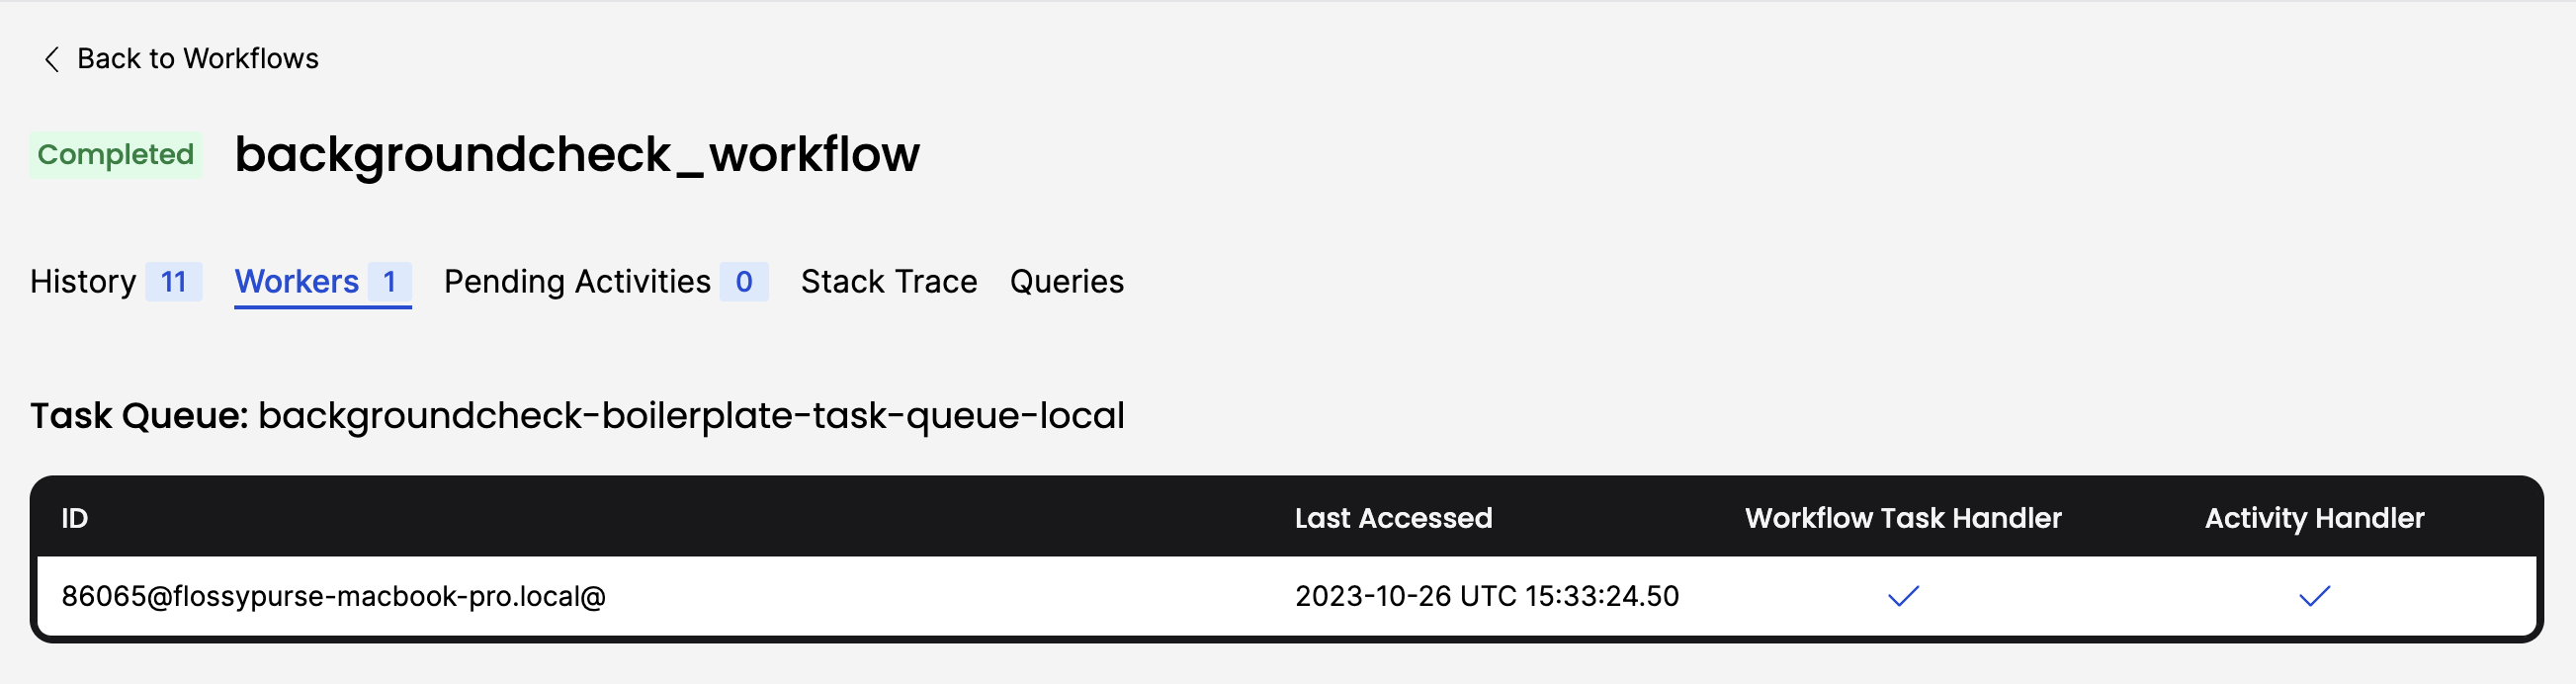
Visit the Workflow Execution's details page and click on the Task Queue name to see polling Workers:
Temporal Cloud
Run the temporal workflow start command and specify the certificate and private key arguments:
temporal workflow start \
 --task-queue backgroundcheck-boilerplate-task-queue-cloud \
 --type backgroundCheck \
 --input '"555-55-5555"' \
 --namespace <namespace>.<account-id> \
 --workflow-id backgroundcheck_workflow \
 --address <namespace>.<account-id>.tmprl.cloud:<port> \
 --tls-cert-path ca.pem \
 --tls-key-path ca.key
Use environment variables to quickly switch between a local dev server and Temporal Cloud.
# set Cloud env variables
temporal env set cloud.namespace <namespace>.<account-id>
temporal env set cloud.address <namespace>.<account-id>.tmprl.cloud:<port>
temporal env set cloud.tls-cert-path ca.pem
temporal env set cloud.tls-key-path ca.key
# set local env variables
temporal env set local.namespace <namespace>
Then provide a single --env command option:
temporal workflow start \
 # ...
 --env cloud \
 # ...
List Workflows
temporal workflow list \
 --tls-cert-path ca.pem \
 --tls-key-path ca.key \
 --namespace <namespace>.<account-id> \
 --address <namespace>.<account-id>.tmprl.cloud:<port>
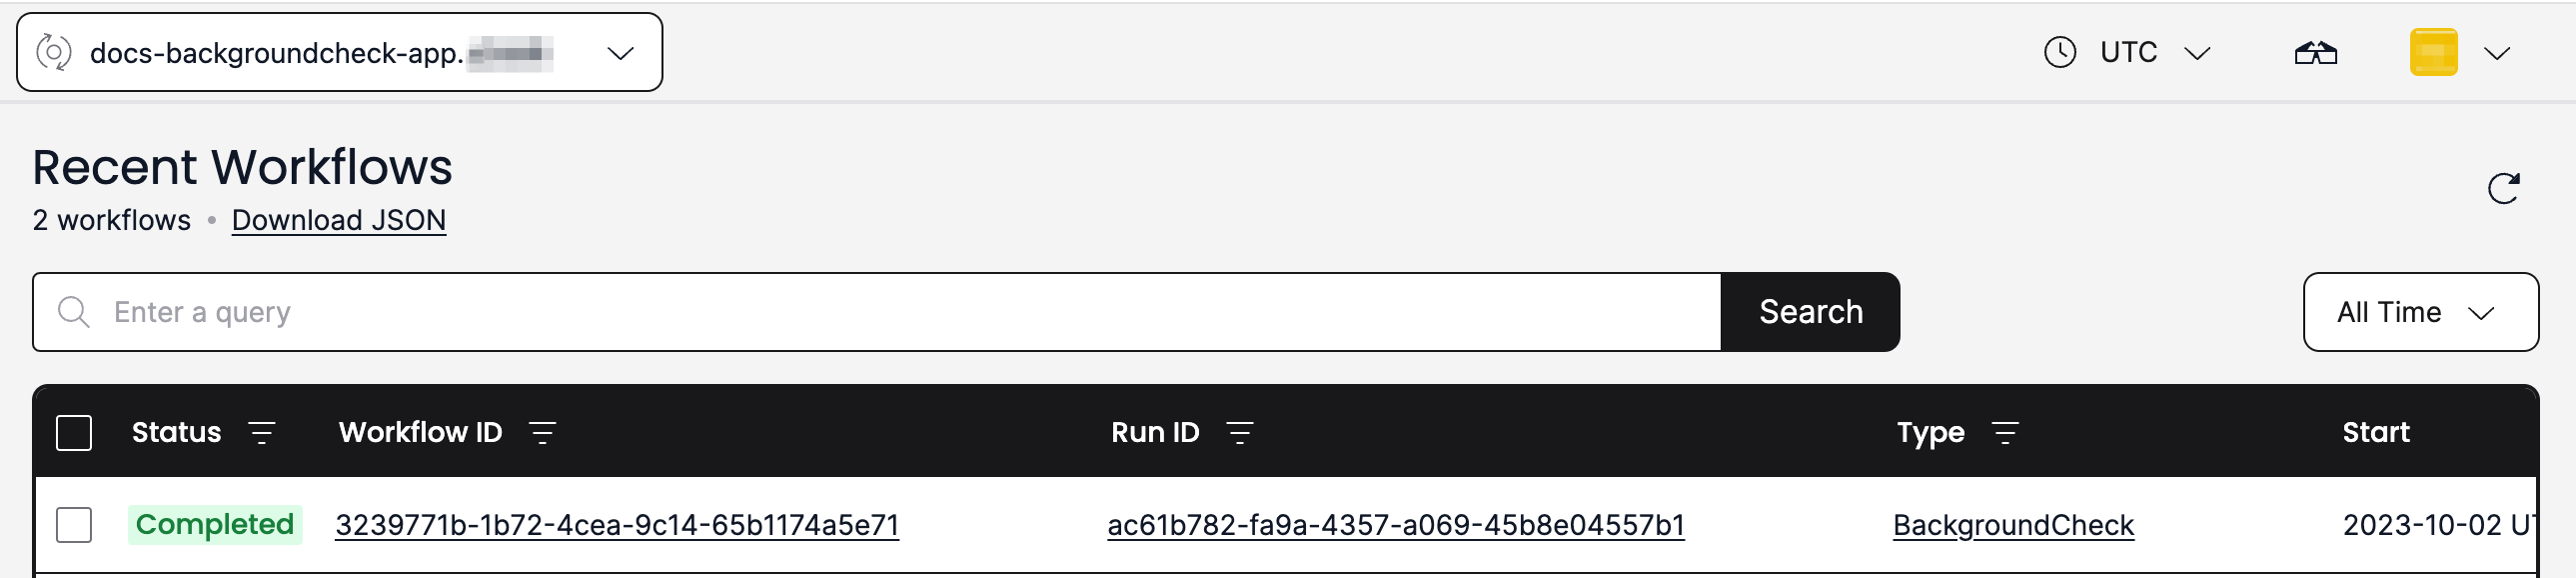
View in Web UI
Visit the Workflows page of your Cloud Namespace - the URL looks like:
https://cloud.temporal.io/namespaces/<namespace>.<account-id>/workflows
Self-hosted
Use your Temporal CLI alias to run the temporal workflow start command:
temporal_docker workflow start \
 --task-queue backgroundcheck-boilerplate-task-queue-self-hosted \
 --type backgroundCheck \
 --input '"555-55-5555"' \
 --namespace backgroundcheck_namespace \
 --workflow-id backgroundcheck_workflow
List Workflows
temporal_docker workflow list \
 --namespace backgroundcheck_namespace
Add a testing framework
Each Temporal SDK has a testing suite that can be used in conjunction with a language-specific testing framework. In the TypeScript SDK, use the Mocha library and the @temporalio/testing package.
Add Workflow function tests
You can test Workflow code for the following conditions:
- Workflow status - did the Workflow reach a completed status?
- Error when checking for a result of a Workflow.
- Workflow return value - is it what you expected?
Add the following code to src/mocha/backgroundcheck.test.ts:
import { TestWorkflowEnvironment } from '@temporalio/testing';
import { Worker } from '@temporalio/worker';
import assert from 'assert';
import { before, describe, it } from 'mocha';
import { backgroundCheck } from '../workflows';

describe('Background check workflow', () => {
  let testEnv: TestWorkflowEnvironment;

  before(async () => {
    testEnv = await TestWorkflowEnvironment.createLocal();
  });

  after(async () => {
    await testEnv?.teardown();
  });

  it('successfully completes the Workflow', async () => {
    const ssn = '111-22-3333';
    const { client, nativeConnection } = testEnv;
    const taskQueue = 'testing';

    const worker = await Worker.create({
      connection: nativeConnection,
      taskQueue,
      workflowsPath: require.resolve('../workflows'),
      activities: {
        ssnTrace: async () => 'pass',
      },
    });

    const result = await worker.runUntil(
      client.workflow.execute(backgroundCheck, {
        args: [ssn],
        workflowId: 'background-check-test',
        taskQueue,
      }),
    );
    assert.equal(result, 'pass');
  });
});
This test uses a local testing server shipped with the SDK. In the test body, you create a Worker, register the Workflow and Activities, and mock out the Activity to return a specific result. client.workflow.execute(...) executes the Workflow logic and any invoked Activities inside the test process.
Add Activity function tests
You can test Activity code for the following conditions:
- Error when invoking the Activity Execution.
- Error when checking for the result of the Activity Execution.
- Activity return values.
Add the following code to src/mocha/ssntrace.test.ts:
import { MockActivityEnvironment } from '@temporalio/testing';
import assert from 'assert';
import { describe, it } from 'mocha';
import * as activities from '../activities';

describe('ssnTrace activity', async () => {
  it('successfully passes the ssn trace', async () => {
    const env = new MockActivityEnvironment();
    const ssn = '111-22-3333';
    const result = await env.run(activities.ssnTrace, ssn);
    assert.equal(result, 'pass');
  });
});
Conclusion
You created a project with TypeScript, created your first Workflow and Activity definitions, configured a Worker, and wrote tests. You can now:
- Describe the tools available and recommended to develop Workflows.
- Describe the code that actually forms a Temporal application.
- Implement an appropriate testing framework.
Get notified when we launch new educational content
New courses, tutorials, and learning resources - straight to your inbox.